Delicious Easy Homemade Cheese Rolls: A Step-by-Step Guide with Customization and Storage Tips


Easy homemade cheese rolls are a delightful treat that’s perfect for breakfast, lunch, or a snack. Indulge in the comforting aroma of freshly baked bread, made right in your own kitchen. Moreover, this classic recipe is easy to follow, requiring only a few basic ingredients. With a fluffy texture and a delightful cheesy flavor, these rolls are irresistibly delicious.
Key Features of This Recipe:
- Easy-to-follow instructions: Specifically, no complicated techniques or ingredients needed to make these easy homemade cheese rolls.
- Customizable: Additionally, experiment with different types of cheese, herbs, or add-ins to suit your taste.
- Versatile: Enjoy these cheesy rolls for breakfast, lunch, or as a side dish. Further, add cheese in the center of the rolls for some gooey cheesy bread or serve it with a piece of cheese.
Ingredients You’ll Need to Make this Easy Homemade Cheese Rolls Recipe:
Get Recipe- 550 grams milk
- 120 grams cheddar cheese (mild or sharp)
- 675 grams all-purpose flour
- 40 grams granulated sugar
- 18 grams instant yeast
- 6 grams kosher salt
- A small amount of neutral oil for greasing the proofing bowl
- 1-2 tablespoons melted butter
Recommended Basic Equipment for Making Easy Homemade Cheese Rolls:
Having the right equipment when making bread simplifies the process. While these easy homemade cheese bread can be done by hand, the kneading process is quicker and easier when done in a kitchen aid mixer. Plus, some other standard bread making equipment used, includes, small saucepan, digital thermometer, glass mixing bowl, round cake pan, bench scraper, pastry brush, and wire cooling rack.
Understanding the Windowpane Test:
Whether you’re making our simple Pull-Apart Brioche Bread, or this easy rustic bread or the easy homemade cheese rolls, the windowpane test is a simple method to determine if your dough has been kneaded enough. Importantly, it helps to ensure that the gluten in the dough has developed properly, resulting in a soft and chewy texture. Specifically, to perform the windowpane test, take a small piece of dough and gently stretch it until it’s thin and translucent. If you can see light through the dough without it tearing, it has passed the test.
Tips: How to Store Easy Homemade Cheese Rolls Leftovers:
- Refrigerate: Specifically, storing the leftover easy homemade cheese rolls are as easy as placing them in a brown paper bag or airtight container in the refrigerator for up to 5 days.
- Freeze: Additionally, for longer storage, wrap the easy homemade cheese rolls tightly in plastic wrap and freeze for up to 3 months. Defrost in the refrigerator overnight and reheat in a preheated oven at 350°F for 8-10 minutes.
Customization Ideas:
- Cheese: Further, experiment with different types of cheese, such as mozzarella, Swiss, or Colby.
- Herbs: Additionally, add dried or fresh herbs like rosemary, thyme, or oregano to the dough for a flavorful twist.
- Sweeteners: For a sweeter treat, increase the amount of sugar or add a teaspoon of honey or maple syrup. Importantly, be careful about how much more sweetness gets added – this may interfere with proofing the dough.
- Add-ins: Moreover, incorporate other ingredients like chopped nuts, dried fruit, or chocolate chips for a unique flavor.
Conclusion:
These easy homemade cheese rolls are a delicious and customizable treat that’s perfect for any occasion. By following these simple steps and incorporating your favorite ingredients, you can create a batch of rolls that your family and friends will love. Therefore, why not give it a try and enjoy the satisfaction of baking your own delicious treats?
Popular Bread Recipes:


Recommended Youtube Tutorial
Disclosures:
Terms of Use
The contents of this website are for educational purposes and are not intended to offer personal medical advice. You should seek the advice of your physician or other qualified health provider with any questions you may have regarding a medical condition. Never disregard professional medical advice or delay in seeking it because of something you have read on this website. The Nutrition Source does not recommend or endorse any products.
Product disclosures
Some of the links in this post are affiliate links. This means that, at zero cost to you, JulietKitchen may earn an affiliate commission if you click through the link and finalize a purchase.
Nutritional information
This website provides approximate nutrition information for convenience and as a courtesy only. Nutrition information can vary for a variety of reasons. For the most precise nutritional data use your preferred nutrition calculator based on the actual ingredients you used in the recipe

Easy Homemade Cheese Rolls
Equipment
- 1 small saucepan For heating the milk and cheese
- 1 Cooking Digital Thermometer for test the liquid temperature
- 1 Kitchen Aid Mixer and dough hook
- 1 Large glass mixing bowl for proofing the dough
- cooking spray for greasing the pan
Ingredients
For the Wet Ingredients
- 550 grams milk
- 120 grams cheddar cheese mild or sharp
For the Dry Ingredients
- 675 grams All purpose flour
- 40 grams granulated sugar
- 18 grams instant yeast
- 6 grams kosher salt
For Proofing the Dough and Brushing the Rolls
- small amount of neutral oil for greasing the proofing bowl
- 1 -2 tablespoons melted butter
Instructions
Heat the Liquid and Cheese:
- Add the milk and cheese to a small saucepan. Heat to 110 – 115 degrees Fahrenheit.Note: The cheese does not need to be melted.550 grams milk, 120 grams cheddar cheese
Make the Dough:
- In a kitchen aid mixer with an attached dough hook, add the flour, sugar, yeast and salt. Give it a quick mix. Pour in the warm milk cheese mixture. Knead on low speed (level 1 -2) until the wet and dry ingredients starts to combine. 2 – 3 minutes.Note: The mixture will start out looking wet. Increase the speed as needed to help pull the flour into the wet dough.675 grams All purpose flour, 40 grams granulated sugar, 18 grams instant yeast, 6 grams kosher salt
- Increase the speed to medium-high to high. Knead the dough until it starts to pull away from the sides of the bowl. 10 – 12 minutes. The dough should be soft and slightly sticky. Use the windowpane test to check for gluten development.Note: Windowpane Test: Take a small piece of the dough between your hands. Gently stretch until its translucent without breaking.
Proof the Dough:
- Transfer the dough into a lightly greased large mixing bowl. Cover with plastic wrap and set aside in a draft free location. Allow to proof until doubled – about 40 to 45 minutes.small amount of neutral oil for greasing the proofing bowl
Shape the Dough Into Rolls and Final Proof:
- Transfer the dough to a clean work surface.Divide into 12 equal portions.Note: You should not need any extra flour to shape the rolls
- Degas the portions to remove excess air-bubbles. Shape into rounds. Add the rounds into a lightly sprayed 12-inches round cake pan. Cover loosely with a clean kitchen towel. Proof for 25 to 30 minutes.
Preheat the oven 350F Degrees Fahrenheit
- Lightly brush the top of the rolls with melted butter.1 -2 tablespoons melted butter
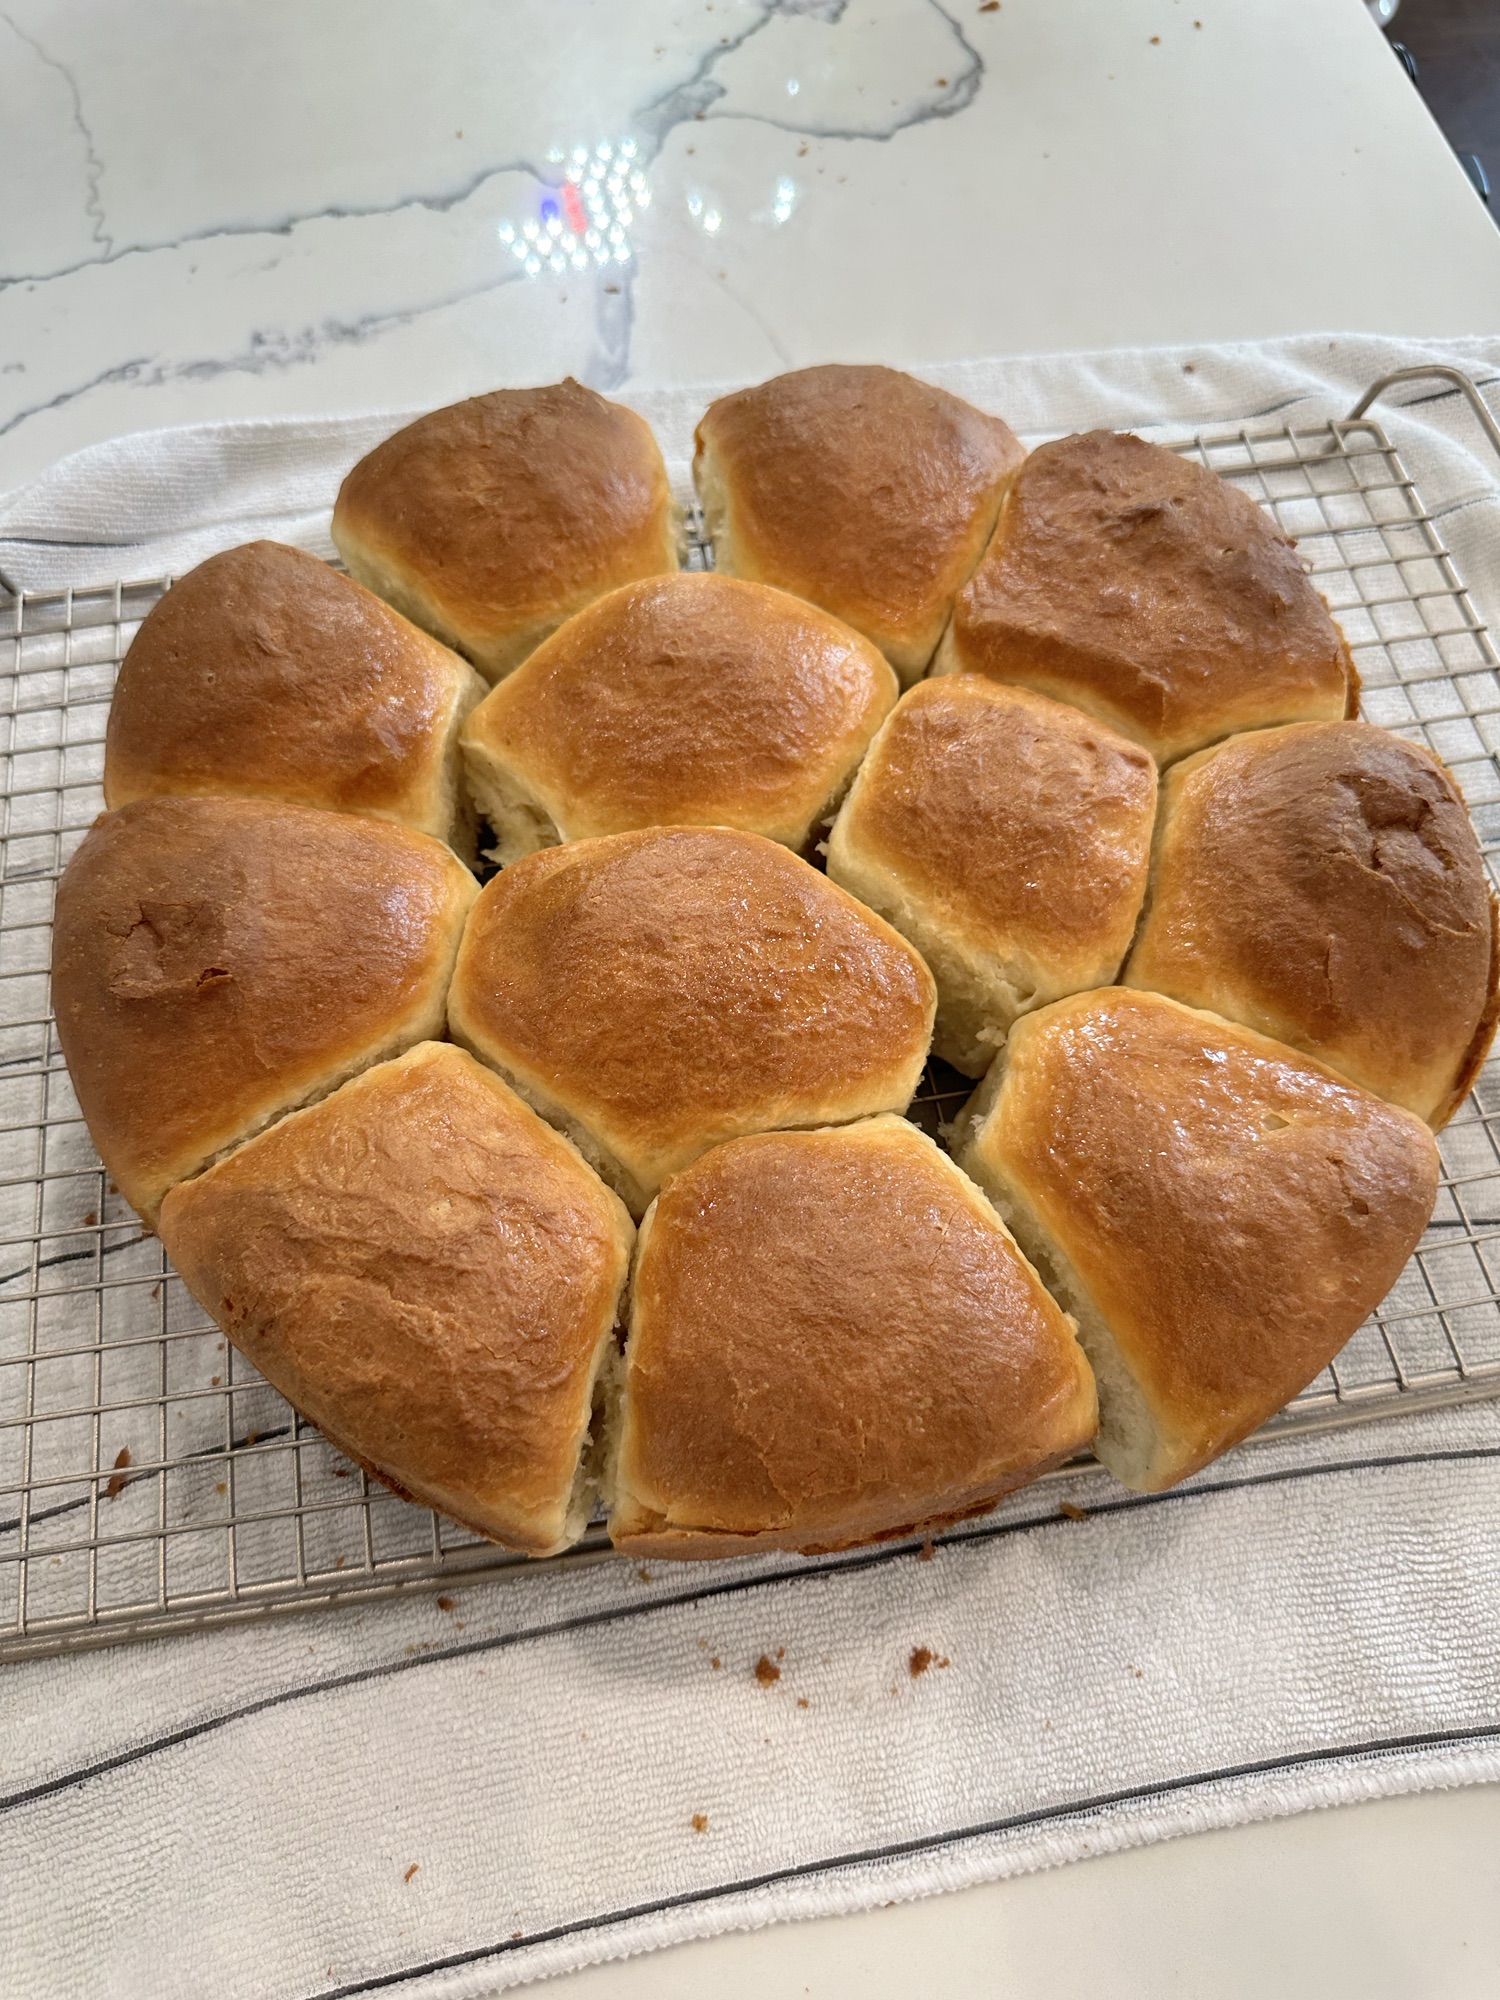
- Bake in the preheated oven for 30 to 35 minutes, until the tops of the rolls are lightly golden. Remove the bread from the oven and transfer onto a wire rack to cool before enjoying.Storage: Excess rolls can be stored in brown paper bags and refrigerated for up to 5 days. For longer storage, wrap tightly with plastic wrap and freeze for up to 3 months. Defrost in refrigerator and reheat for 8 – 10 minutes in a preheated oven – 350F degrees Fahrenheit .
Leave a Reply